Deployment
Deploy via a Kubernetes Deployment#
One way to deploy the application would be to have the images for the front-end and back-end microservice containers already created (via CI/CD) and stored in an image repository. You can then create Kubernetes deployments (YAML) and use those to deploy the application. We will do that now.
1. Retrieve the login command#
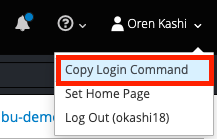
If not logged in via the CLI, click on the dropdown arrow next to your name in the top-right and select Copy Login Command.

A new tab will open and select the authentication method you are using (in our case it's github)
Click Display Token
Copy the command under where it says "Log in with this token". Then go to your terminal and paste that command and press enter. You will see a similar confirmation message if you successfully logged in.
$ oc login --token=RYhFlXXXXXXXXXXXX --server=https://api.osd4-demo.abc1.p1.openshiftapps.com:6443
Logged into "https://api.osd4-demo.abc1.p1.openshiftapps.com:6443" as "0kashi" using the token provided.

You don't have any projects. You can try to create a new project, by running

    oc new-project <projectname>
2. Create new project#
Create a new project called "ostoy" in your cluster by entering the following command:
oc new-project ostoy
You should receive the following response
$ oc new-project ostoy
Now using project "ostoy" on server "https://api.osd4-demo.abc1.p1.openshiftapps.com:6443".

You can add applications to this project with the 'new-app' command. For example, try:

    oc new-app centos/ruby-25-centos7~https://github.com/sclorg/ruby-ex.git

to build a new example application in Ruby.
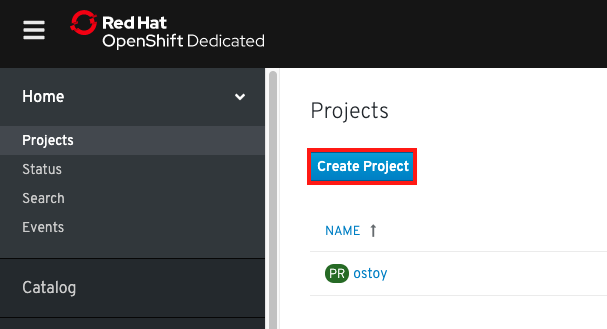
Equivalently you can also create this new project using the web UI by clicking on "Create Project" button on the left.

3. Download the YAML configuration#
Download the Kubernetes deployment object yamls from the following locations to your local machine, in a directory of your choosing (just remember where you placed them for the next step).
ostoy-microservice-deployment.yaml
Feel free to open them up and take a look at what we will be deploying. For simplicity of this lab we have placed all the Kubernetes objects for the front-end in an "all-in-one" yaml file. Though in reality there are benefits (ease of maintenance and less risk) to separating these out into individual yaml files.
4. Deploy the backend microservice#
The microservice serves internal web requests and returns a JSON object containing the current hostname and a randomly generated color string.
In your command line deploy the microservice using the following command:
oc apply -f ostoy-microservice-deployment.yaml
You should see the following response:
$ oc apply -f ostoy-microservice-deployment.yaml
deployment.apps/ostoy-microservice created
service/ostoy-microservice-svc created
5. Deploy the front-end service#
The frontend deployment contains the node.js frontend for our application along with a few other Kubernetes objects to illustrate examples.
If you open the ostoy-fe-deployment.yaml you will see we are defining:
- Persistent Volume Claim
- Deployment Object
- Service
- Route
- Configmaps
- Secrets
In your command line, deploy the frontend along with creating all objects mentioned above by entering:
oc apply -f ostoy-fe-deployment.yaml
You should see all objects created successfully
$ oc apply -f ostoy-fe-deployment.yaml
persistentvolumeclaim/ostoy-pvc created
deployment.apps/ostoy-frontend created
service/ostoy-frontend-svc created
route.route.openshift.io/ostoy-route created
configmap/ostoy-configmap-env created
secret/ostoy-secret-env created
configmap/ostoy-configmap-files created
secret/ostoy-secret created
6. Get the route#
Get the route so that we can access the application via oc get route
You should see the following response:
NAME          HOST/PORT                                       PATH      SERVICES              PORT      TERMINATION   WILDCARD
ostoy-route   ostoy-route-ostoy.apps.osd4-demo.abc1.p1.openshiftapps.com  ostoy-frontend-svc   <all>             None
7. View the app#
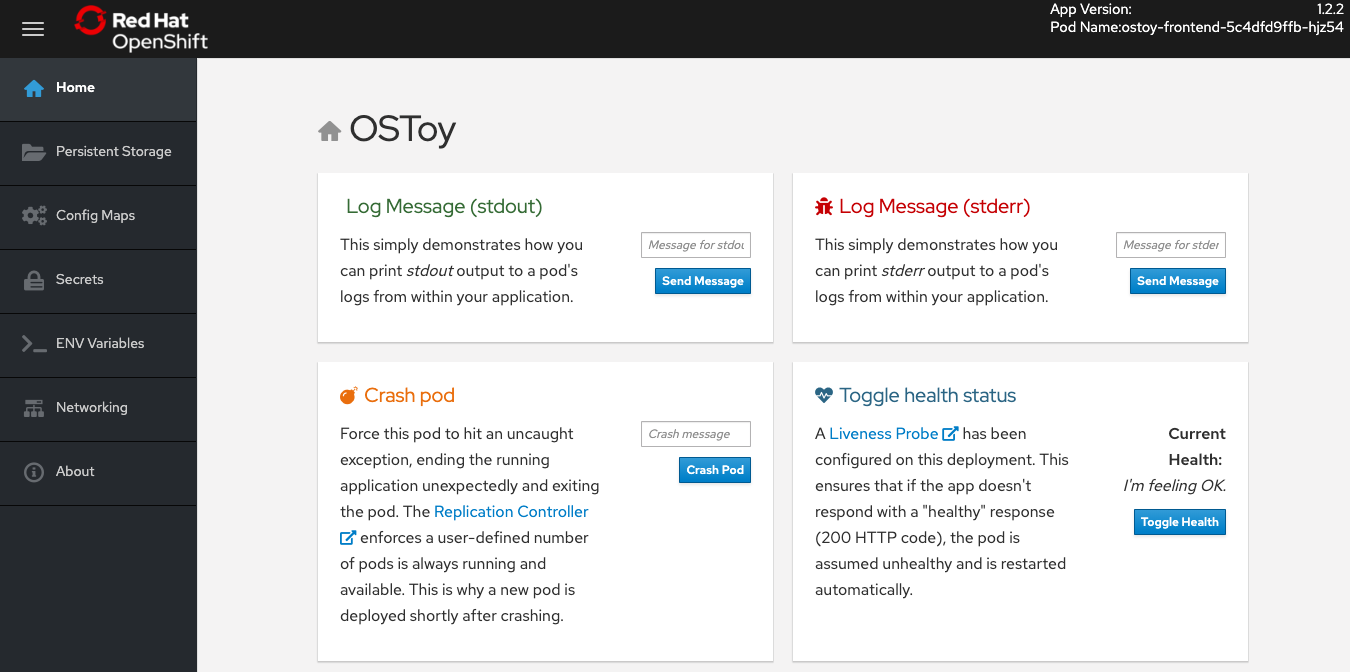
Copy ostoy-route-ostoy.apps.osd4-demo.abc1.p1.openshiftapps.com above and paste it into your browser and press enter. You should see the homepage of our application.
